
Connect rompix to ChatGPT & Claude
rompix runs a small MCP server, so an AI client like ChatGPT or Claude can create a scene in your rompix account and start its first image render — then hand you back a link to open it on the canvas and keep iterating. Connecting takes a couple of minutes and uses OAuth (you sign in with Google and approve a consent screen). Generating a scene spends your rompix credits.
What you'll need
- The rompix MCP server URL:
https://app.rompix.com/api/mcp - A ChatGPT plan that supports custom connectors on the web app (Plus, Pro, Business, Enterprise, or Edu) — or a claude.ai account.
- A Google account with a verified email — sign in with any Google account; no invite or approval needed.
Connect from ChatGPT (Developer Mode)
ChatGPT adds custom MCP connectors through Developer Mode. Turn it on once, then add rompix as a connector.
-
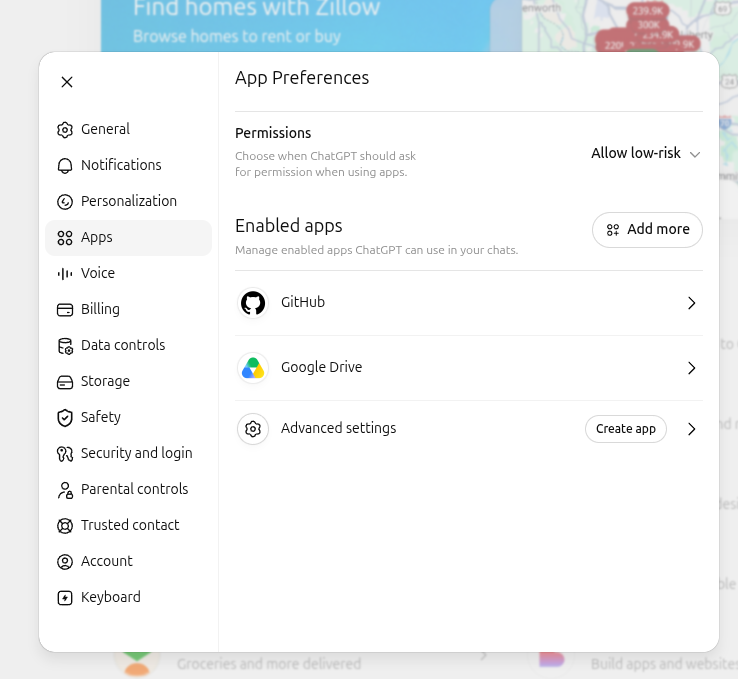
Open Settings → Apps.
On the web app, open Settings and go to Apps (App
Preferences). This is where connectors live.
-
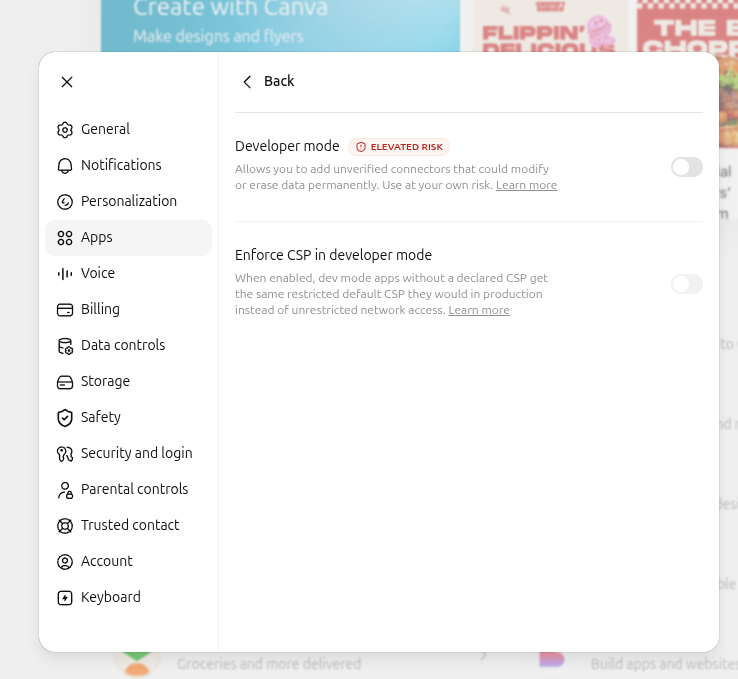
Enable Developer mode.
Open Advanced settings and turn Developer mode on. It
warns about elevated risk — that's expected for custom connectors; accept it. You can
leave “Enforce CSP in developer mode” off.
- Create the connector. Go back to Apps and click Create app (Create connector).
-
Fill in the form.
Set Name to
rompix, leave the connection on Server URL and enterhttps://app.rompix.com/api/mcp, and set Authentication to OAuth. (Not “No authentication” and not an API key — rompix only accepts OAuth.) Acknowledge the custom-connector risk notice (“I understand and want to continue”), then click Create.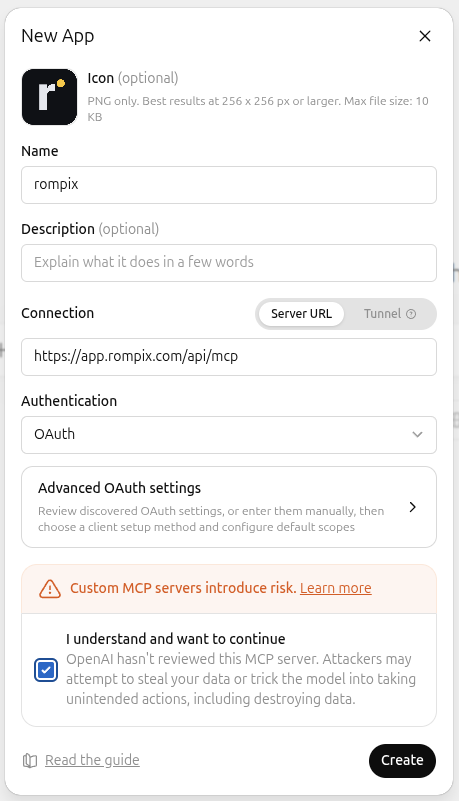
-
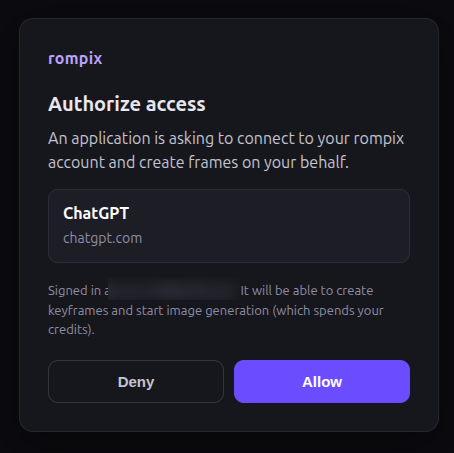
Authorize.
The first time you use the connector, ChatGPT runs the OAuth flow: it sends you to rompix,
you sign in with Google, then approve the
“Authorize access” consent screen (it shows the connector’s name and
warns it can create scenes and spend your credits). Click Allow.
-
Use it.
Ask ChatGPT to create a scene (for example: “create a scene: a neon-lit alley at night”).
The
create_scenetool runs and returns a link likehttps://app.rompix.com/?scene=…— open it to see the scene on the canvas.
Connect from claude.ai
The same server works as a custom connector in claude.ai. The authorization step is identical (Google sign-in → the same rompix consent screen).
-
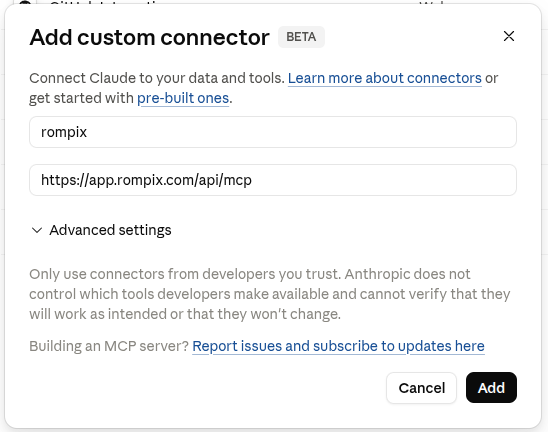
Add a custom connector.
In claude.ai, open Settings → Connectors and choose
Add custom connector.
-
Enter the URL.
Set the name to
rompixand the URL tohttps://app.rompix.com/api/mcp, then click Add. - Authorize. Sign in with Google and approve the “Authorize access” consent screen, same as above.
-
Use it.
Ask Claude to create a scene;
create_scenereturns the?scene=…link to open it on the canvas.
The tool — create_scene
rompix exposes exactly one tool. It creates a new scene, starts its first image render, and returns a link to open the scene.
| Field | Required | Default | Notes |
|---|---|---|---|
| description | Yes | — | 1–2000 characters. Becomes the scene’s name (first 60 characters) and the prompt for the first image. |
| aspect | No | 9:16 |
One of 9:16, 16:9, 1:1. Fixed for the life of the scene. |
| resolution | No | 1080p |
One of 720p, 1080p. |
Returns a link to the new scene on your canvas:
https://app.rompix.com/?scene=<id>.
Troubleshooting
- Stuck at sign-in, or you see
access_denied - The Google account you signed in with doesn’t have a verified email address. Sign in with a Google account whose email is verified, then try again.
- The connector won’t add, or you get an OAuth discovery error
- Make sure the URL is exactly
https://app.rompix.com/api/mcp— no trailing slash and no extra path. rompix publishes the OAuth discovery documents the client looks for under/.well-known/, so the bare/api/mcpURL is all you enter. - You get a 401 / “unauthorized”
- rompix accepts OAuth tokens only — it does not take a static API key or personal access token. Make sure Authentication is set to OAuth and complete the sign-in + consent flow.
- It asks you to approve a consent screen every time you authorize
- That’s intentional. The screen shows the connecting app’s name and where it will send you back, so you can confirm it’s the app you expect before granting access.